In this article, you will understand step by step how to easily integrate Scytale with Azure integrations
Learn how to connect multiple Azure services seamlessly using the same credentials, simplifying integration and ensuring access for most Microsoft integrations. We will guide you through setting up permissions for Azure services integrated with Scytale.
💡Please Note: This guide covers the integration process for most Azure services, excluding Microsoft Intune, Azure Active Directory, Azure DevOps, and Azure Boards, which have separate guides.
Permissions for Azure Integrations
The following read-only actions must be assigned via a custom role to allow Scytale to collect evidence from Azure services:
"permissions": [
            {
                "actions": [
                    "Microsoft.Network/*/read",
                    "Microsoft.ClassicNetwork/*/Read",
                    "Microsoft.Compute/*/Read",
                    "Microsoft.Insights/*/Read",
                    "Microsoft.Storage/*/read",
                    "Microsoft.Sql/*/read",
                    "Microsoft.Resources/*/read",
                    "Microsoft.KeyVault/*/read",
                    "Microsoft.DocumentDB/*/read",
                    "Microsoft.DBforPostgreSQL/*/read"
                ],
                "notActions": [],
                "dataActions": [
                    "Microsoft.KeyVault/*/read"
                ],
                "notDataActions": []
            }
        ]
How to Connect Scytale and Azure Services
-
In Scytale, go to 'Integrations'.

-
Search for any of the supported Azure integrations (see list below) and select 'Connect'.

-
Paste the following credentials:
• Application ID
• Secret Value
• Directory ID
• Subscription IDLearn how to create these credentials here.

-
Add a connection name – this will be used to differentiate between your connections – and then select 'Next'.
-
You will be redirected to a Microsoft login page to accept the app permissions.

-
Click 'Connect' to complete the integration.
You have now successfully connected to your Azure integration!
How To Create Credentials in Azure
Step 1: How to Register an Application in Azure
- Log in to the Azure portal and then navigate to Microsoft Entra ID.
- On the left menu, click on App registrations.

- On the screen that loads, click on New registration and fill in the following details:
- Name - you can choose a name.
- Supported account types - the first option must be selected - "Accounts in this organizational directory only (Default Directory only - Single tenant)".
- Under the Redirect URI - Select web, and paste the following URI:
https://api.scytale.ai/integrations/microsoft-graph/callback/microsoft-graph
-
- Click on Register.

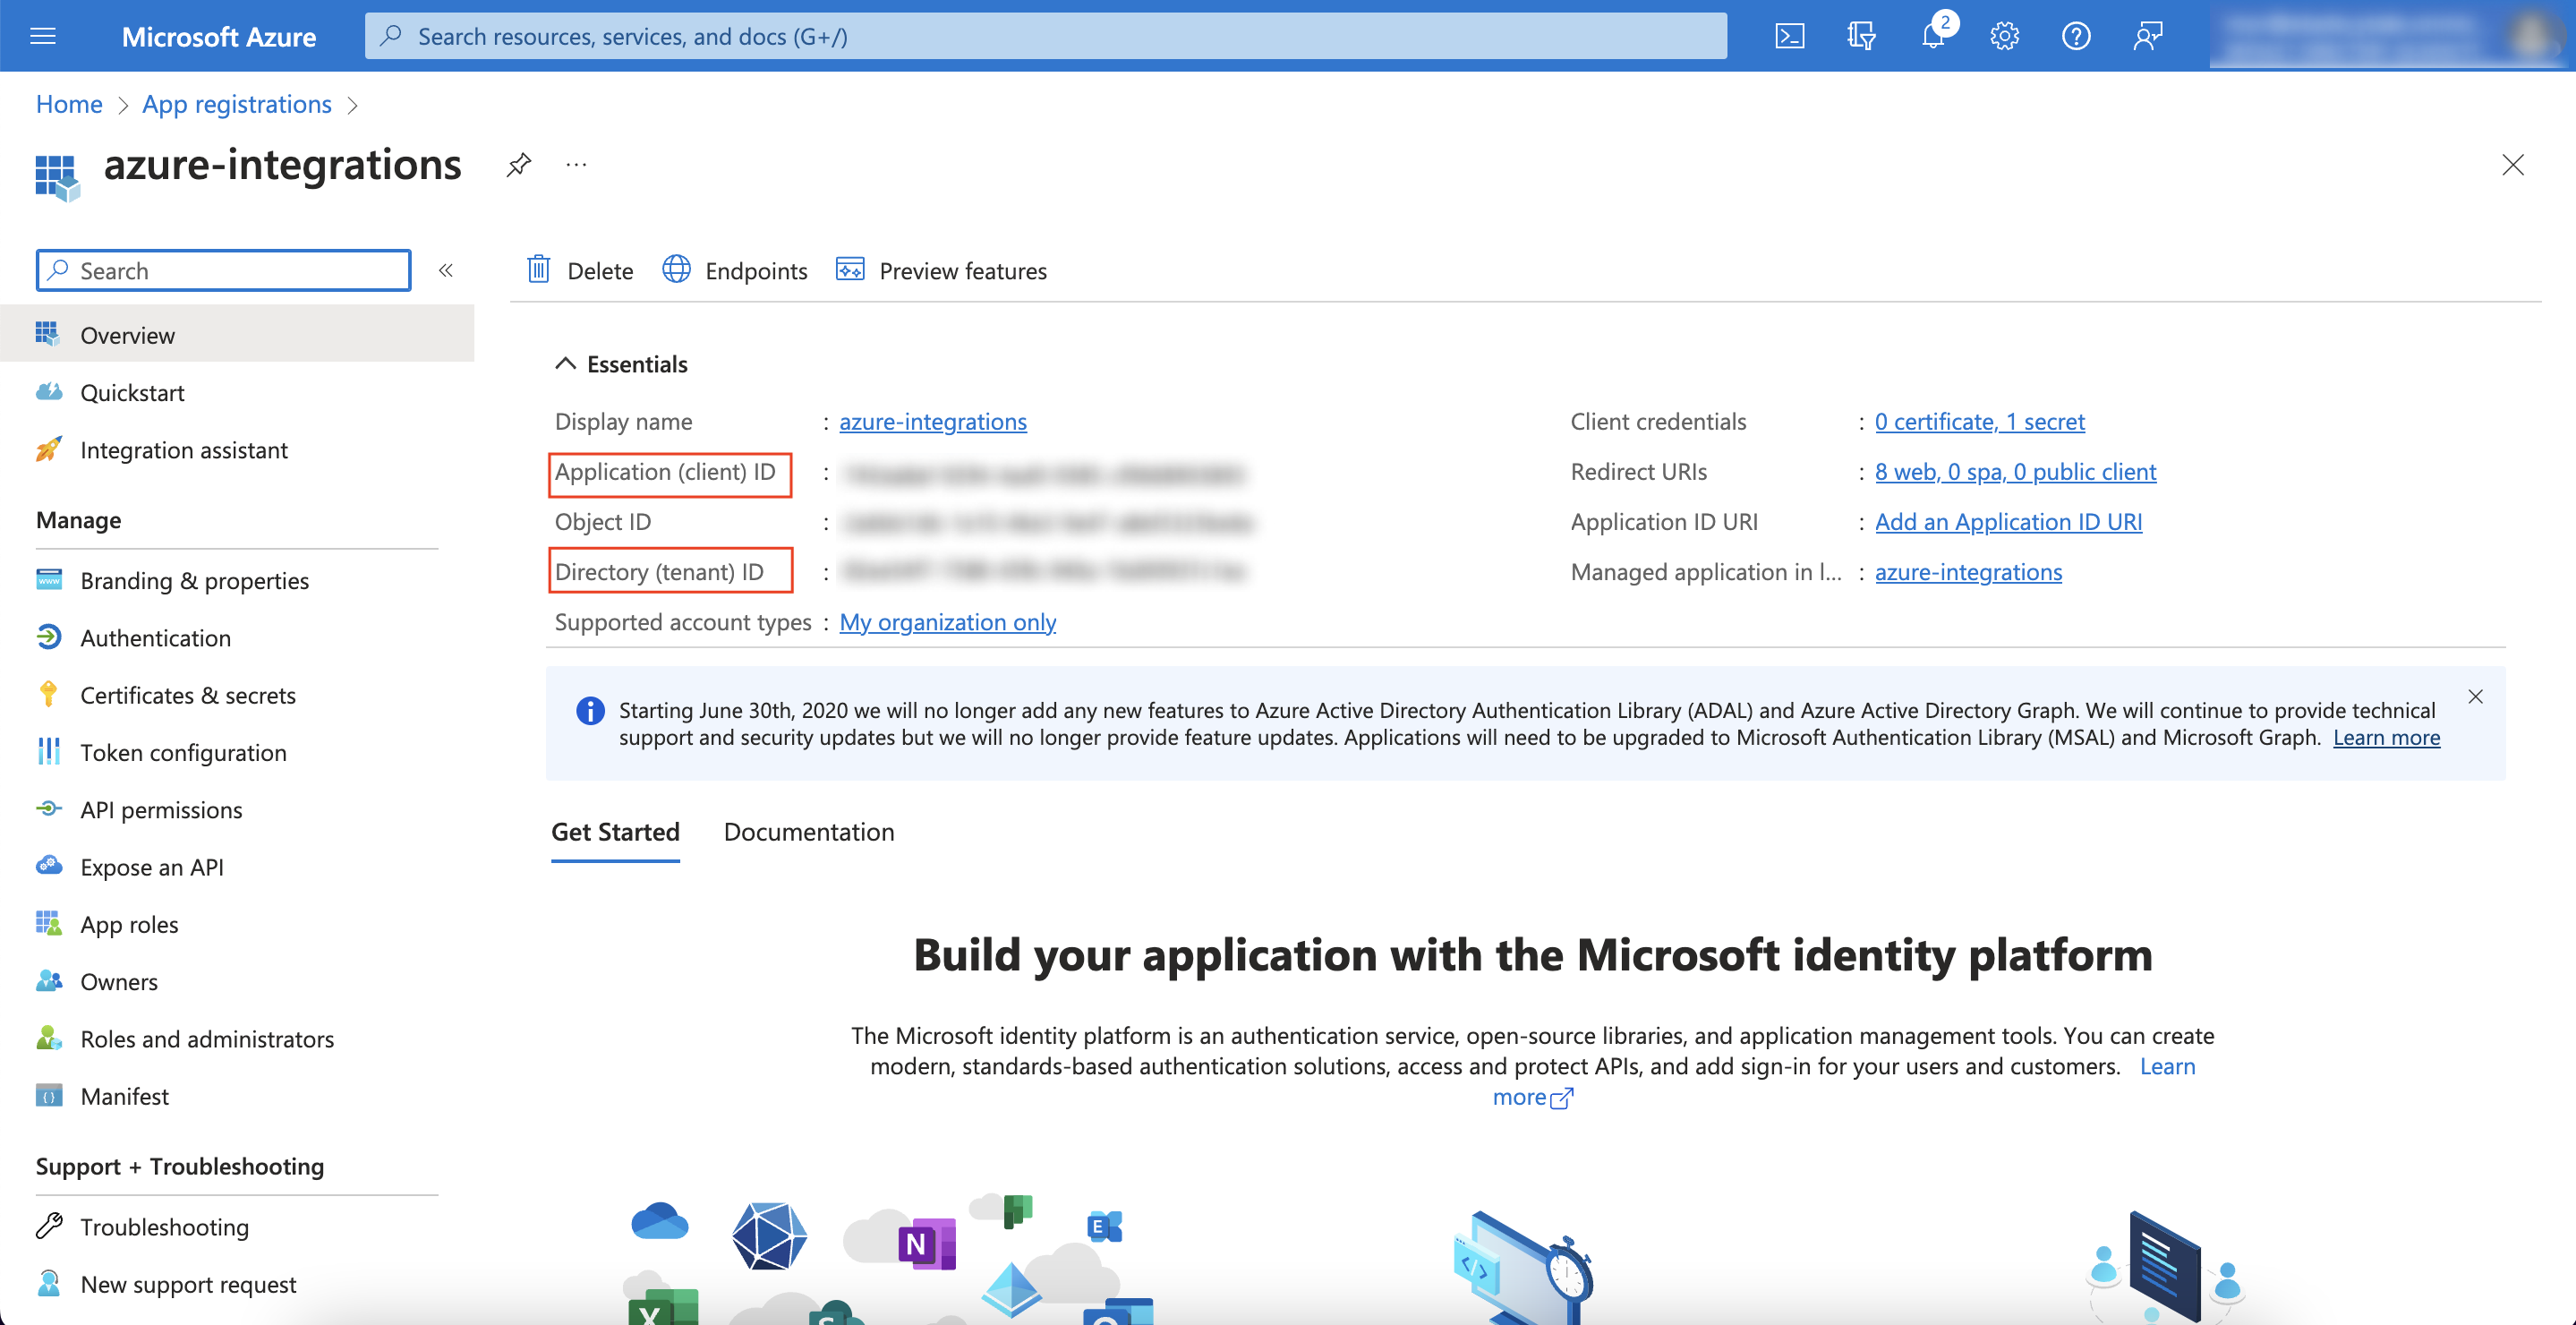
- In the overview tab of the application, refer to the information under "Essentials", copy (you'll use it for Scytale connection):
- Application (Client) ID.
- Directory (tenant) ID.
Step 2: How to Create a Client Secret in Azure
- Go to App registrations.
- Select the application you created in step 1.
- Go to "Certificates & secrets".
- Click on New client secret.
-
Description - Expires - we recommend selecting 24 months (we cannot collect data after the key expires).
-
Click on Add.
- Click on the copy sign on the Value column (you'll use it for Scytale connection).

Step 3: How to Create a Custom Role in Azure
- Go to subscriptions.
- Copy the relevant subscription ID (you'll need to paste it into the scytale integration connection).
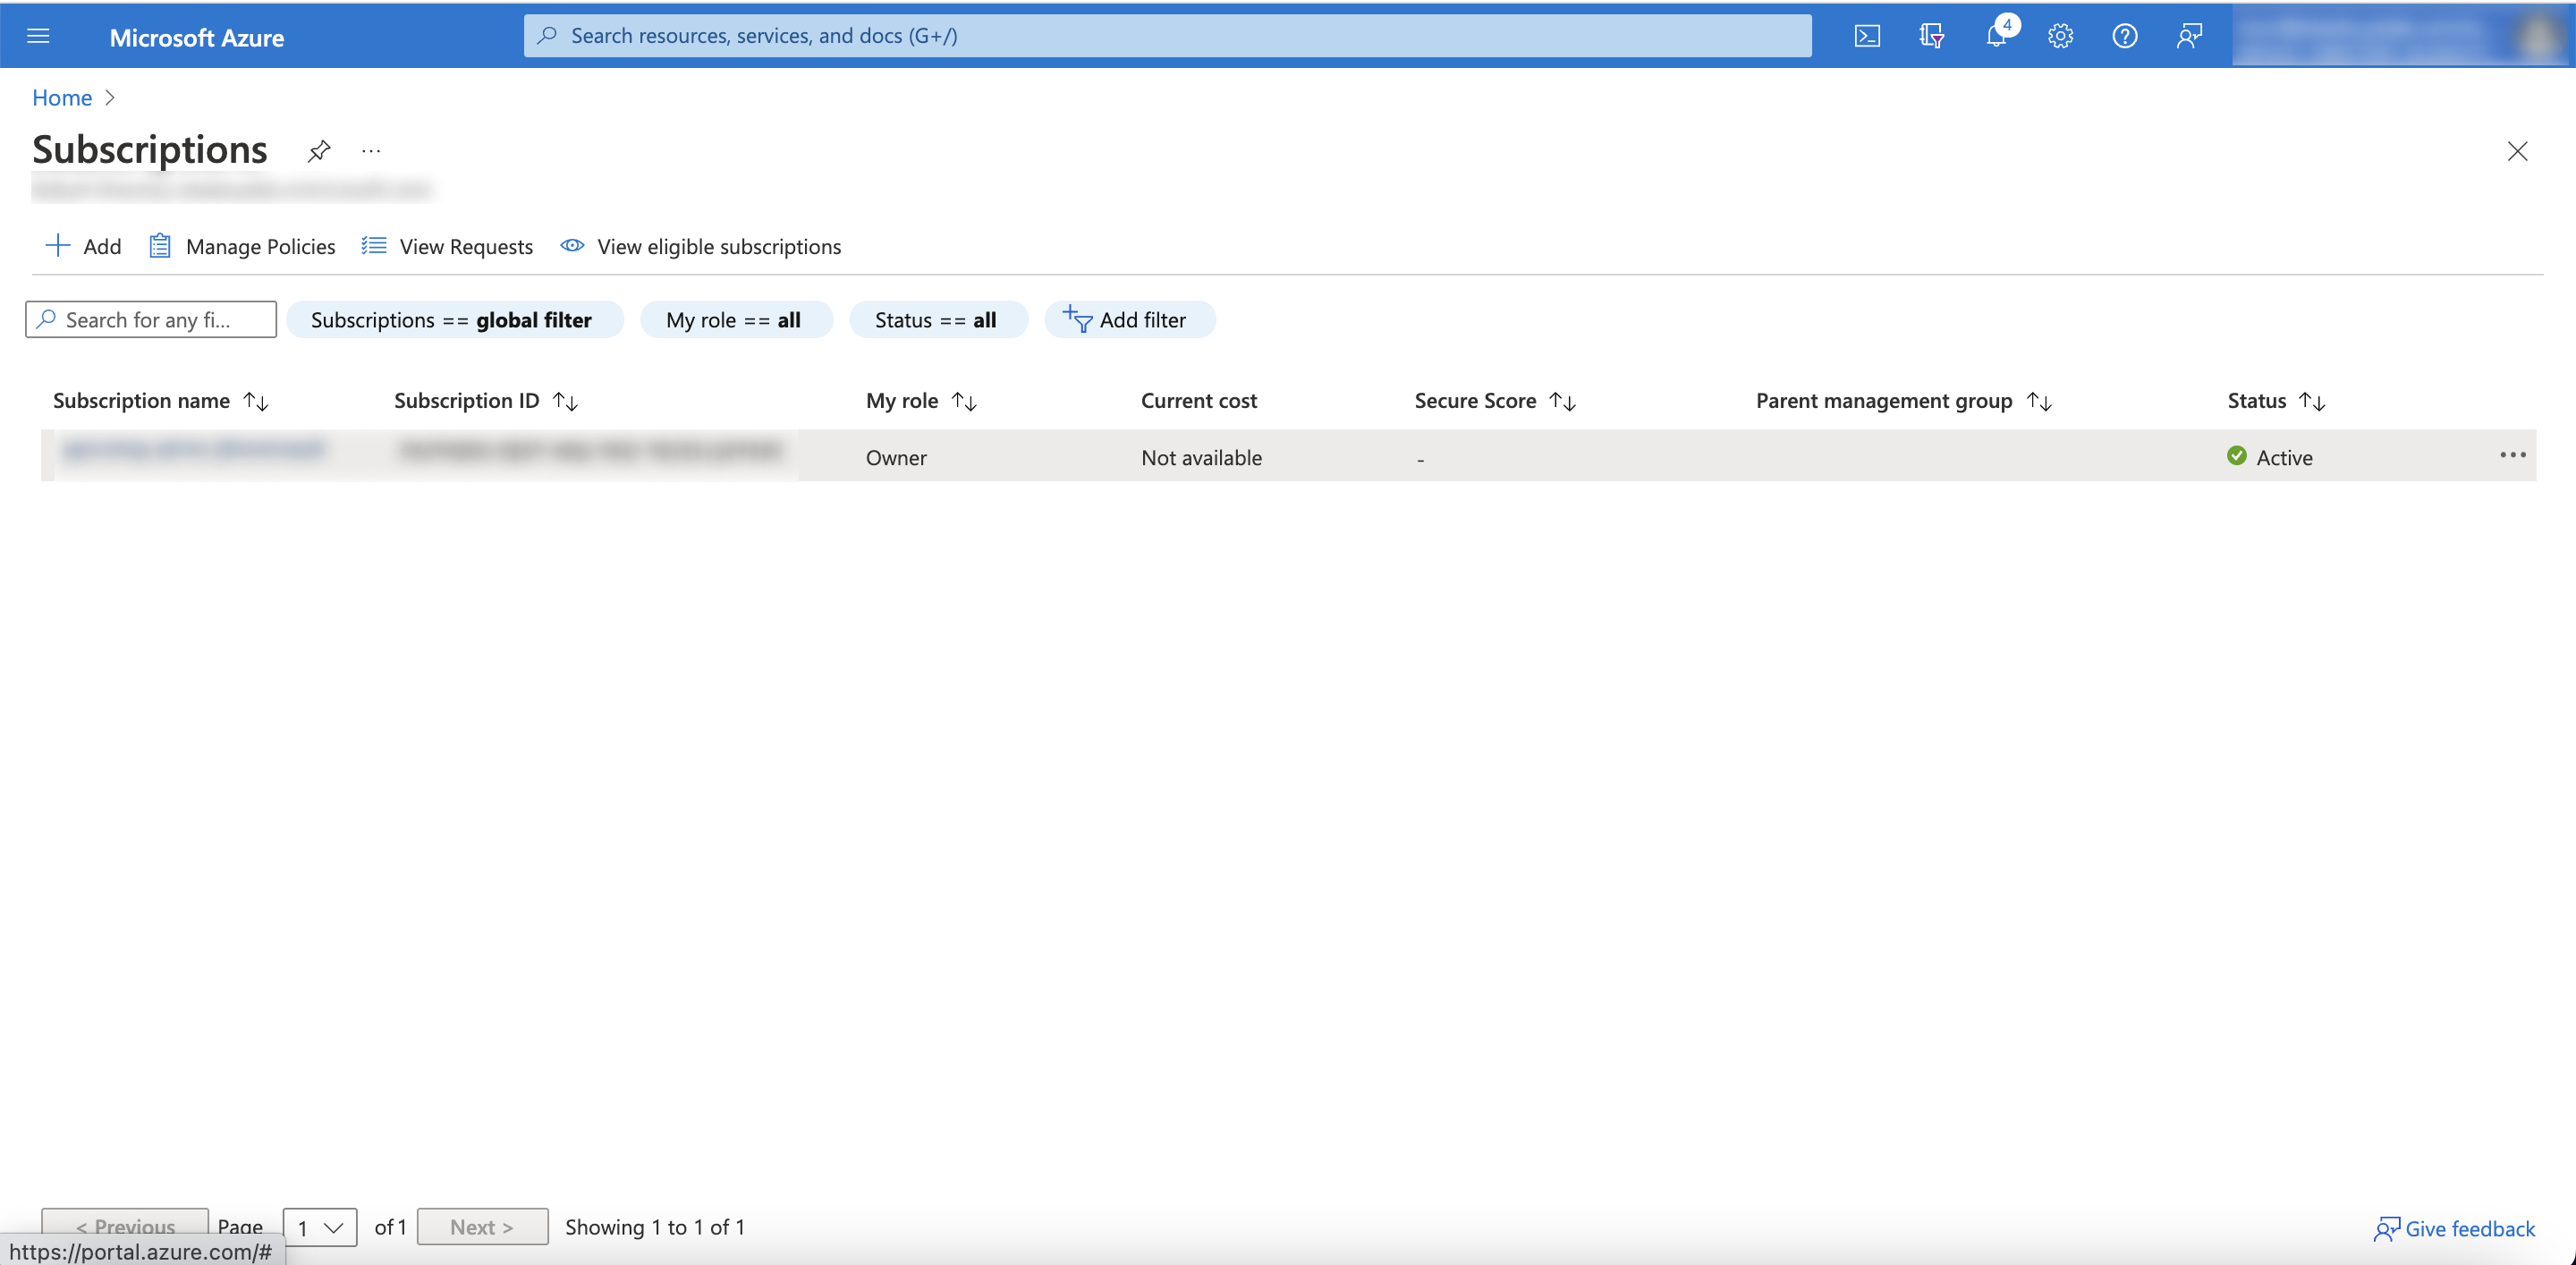
- Click on the relevant subscription.
- Navigate in the subscription menu to 'Access control (IAM)'.
- Select +Add and select the 'Add custom role' option.

- Under the basics tab, choose a name for the 'Custom role name'.
- Click on 'Next'.

- Go to the JSON tab and click on 'Edit'.
- Paste the following JSON snippet in the "permissions" key:
"permissions": [
            {
                "actions": [
                    "Microsoft.Network/*/read",
                    "Microsoft.ClassicNetwork/*/Read",
                    "Microsoft.Compute/*/Read",
                    "Microsoft.Insights/*/Read",
                    "Microsoft.Storage/*/read",
                    "Microsoft.Sql/*/read",
                    "Microsoft.Resources/*/read",
                    "Microsoft.KeyVault/*/read",
                    "Microsoft.DocumentDB/*/read",
                    "Microsoft.DBforPostgreSQL/*/read"
                ],
                "notActions": [],
                "dataActions": [
                    "Microsoft.KeyVault/*/read"
                ],
                "notDataActions": []
            }
] - Click on 'Save', then 'Review + create', and then 'Create'.
Step 4: How to Assign the Role to the Application
- Return again in the subscription menu to 'Access control (IAM)'.
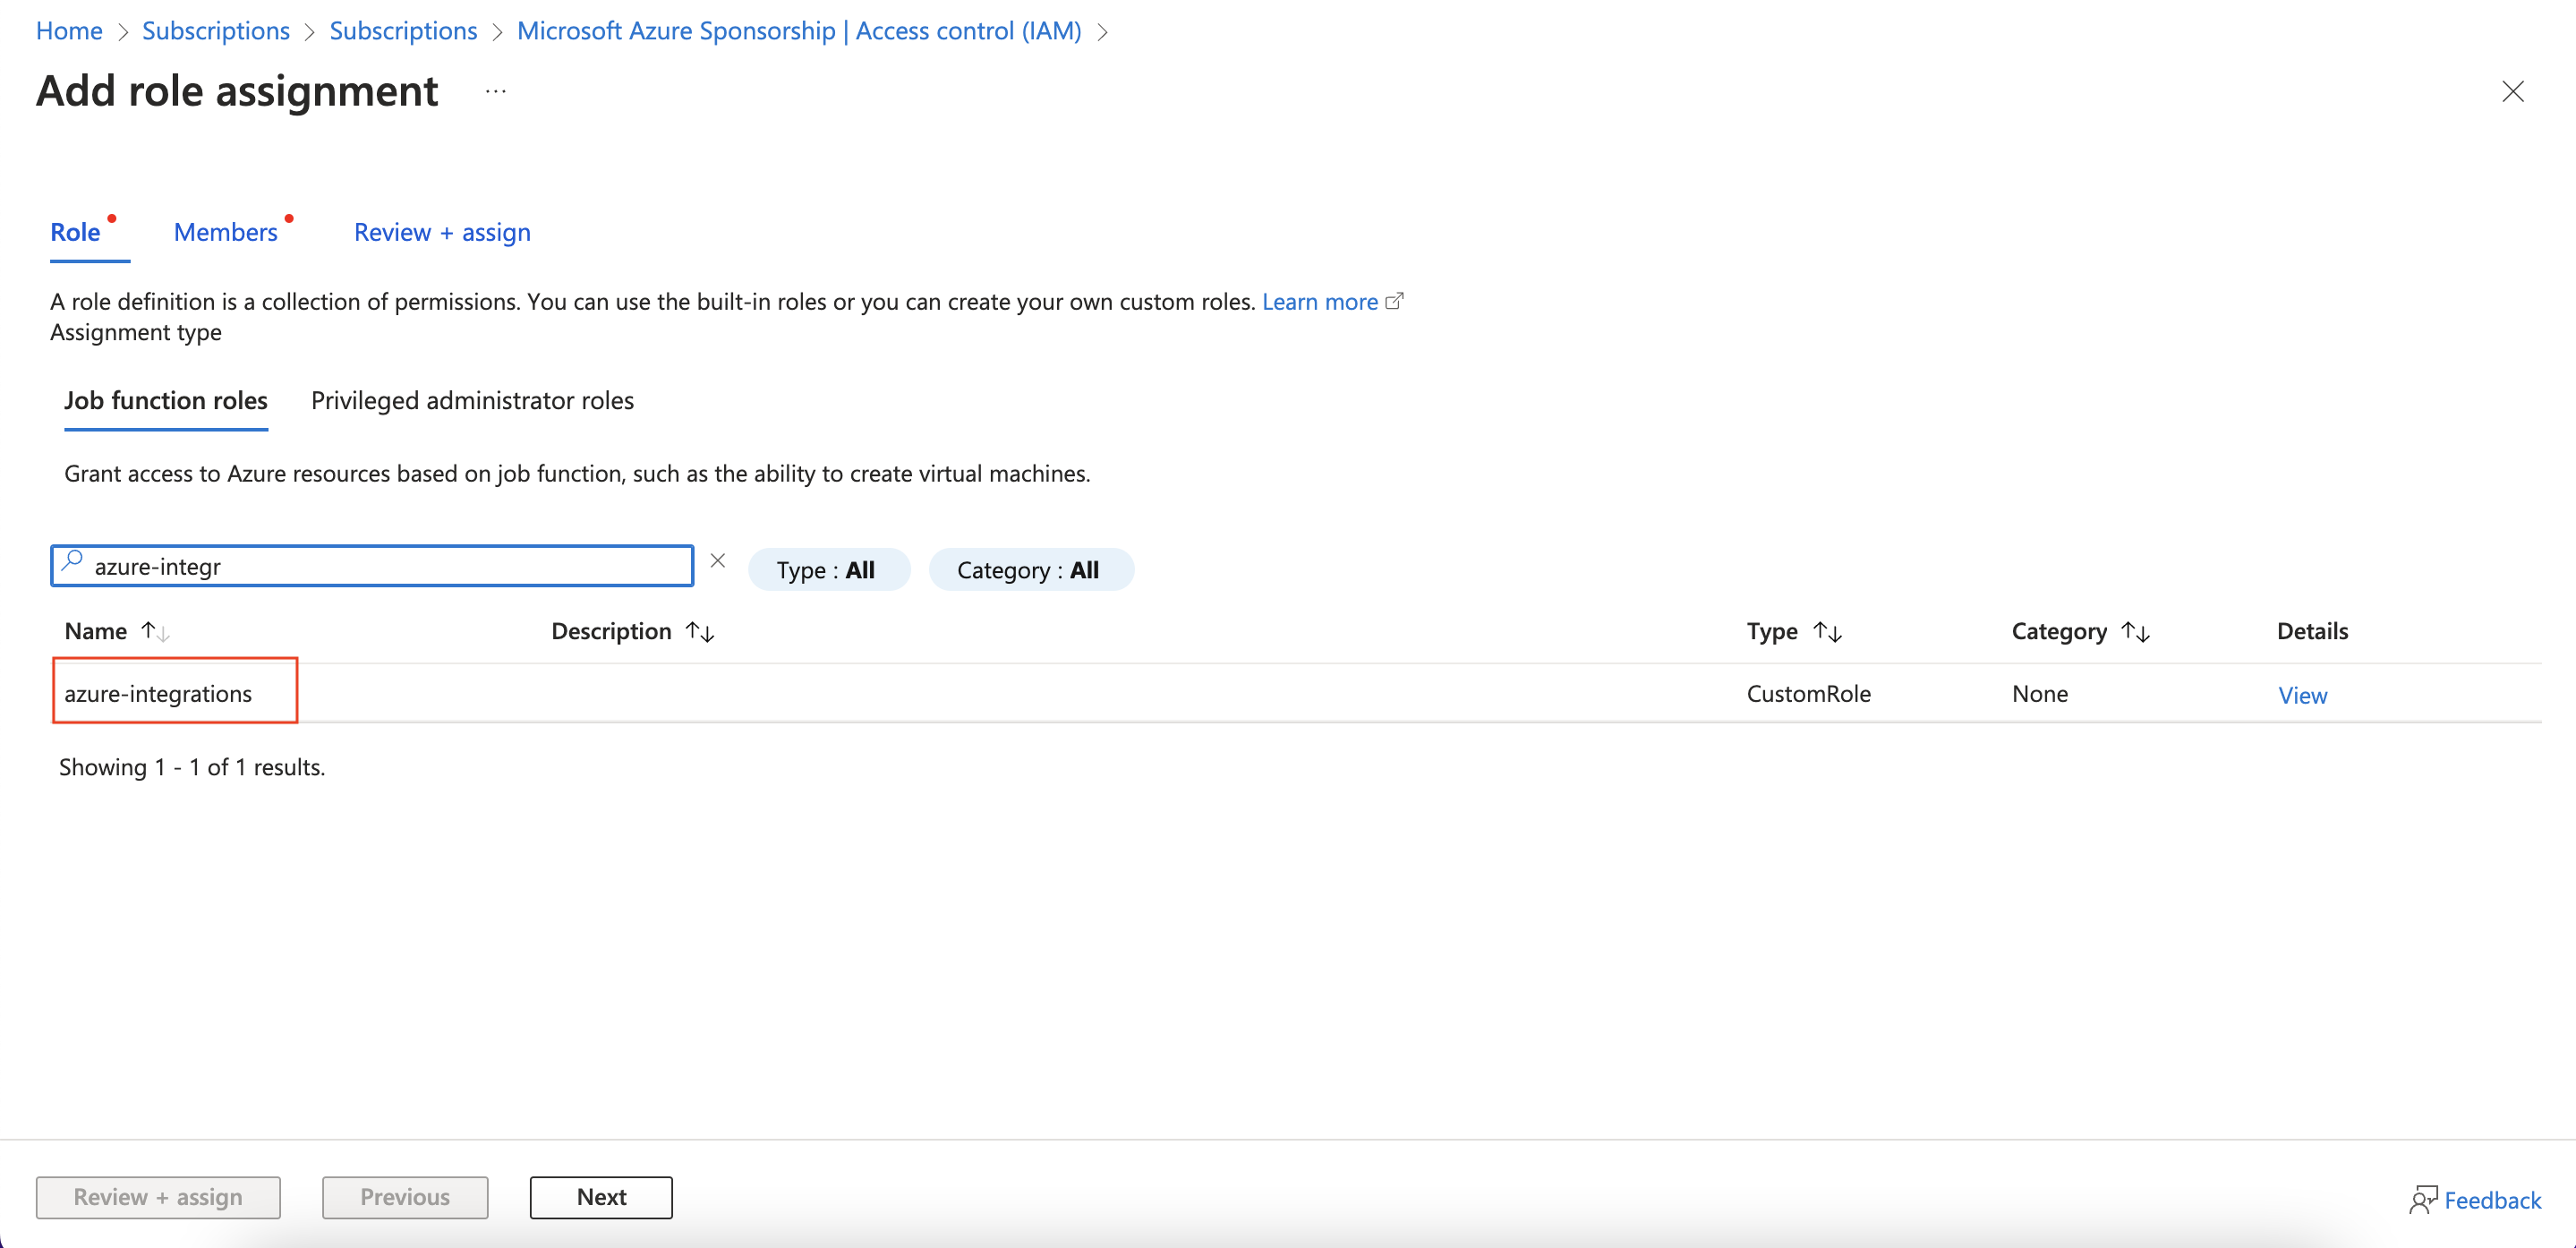
- Select +Add and select the 'Add role assignment' option.

- In the role tab, search for the custom role you created in step 3.
- Click on the role and then select 'Next'.
- In the members tab, on the Members section, click on '+select members'.
- Search the application name you created in step 1 and click on it.
- Click on 'Select'.
- Click on 'Review + assign'.


Supported Azure Integrations
You can use the same credentials for connecting any of the following:
-
Azure SQL Databases
-
Azure Storage Accounts
-
Azure Virtual Machines
-
Azure Firewall
-
Azure Subscriptions
-
Azure Virtual Network
-
Azure Web Application Firewall
-
Azure Cosmos DB
-
Azure Key Vault
⚠️ This guide does not apply to:
Microsoft Intune, Azure Active Directory, Azure DevOps, or Azure Boards — these services have dedicated setup guides.