In this article, you will understand step by step how to easily integrate with Microsoft Intune
Integrating with Microsoft Intune allows you to implement and manage policy configurations on all your operating systems and track all the devices in the organization. The evidence that is automatically obtained here is key for security management of all endpoints to ensure there are no security breaches. This will provide more assurance to the logical access criteria to provide the auditors with the assurance that endpoints are being managed effectively.
Permissions for Microsoft Intune Integration
Below you will find a list of appropriate permissions. All the permissions that Scytale needs for the integration with Microsoft Intune, are read-only permissions and do not allow us to perform any actions within your Microsoft Intune account.
DeviceManagementManagedDevices.Read.AllDeviceManagementConfiguration.Read.All
How to Connect Scytale and Microsoft Intune
1) In Scytale, go to 'Integrations'.

2) Search for Microsoft Intune in the search bar and select 'Connect'.

3) Fill in the following credentials:
-
Application ID - learn how to get this in step 1 below
-
Secret Value - learn how to get this in step 2 below
-
Directory ID - learn how to get this in step 3 below

4) Add a connection name - this will be used to differentiate between your connections - and then select 'Connect'.
You have now successfully connected to Microsoft Intune!
Step 1: How to Register an Application in Azure Active Directory
-
Log in to the Azure portal and then navigate to Microsoft Entra ID.
-
On the left menu, click on App registrations
-
On the screen that loads, click on New registration and fill in the following details:
-
Name - you can choose a name, for example: scytale-Intune-integration
-
Supported account types - the first option must be selected - "Accounts in this organizational directory only (Default Directory only - Single tenant)".
-
Redirect URI - select Web from the drop-down menu, and in the text box paste the following:
https://api.scytale.ai/integrations/microsoft-graph/callback/microsoft-graph -
Click on Register
-


-
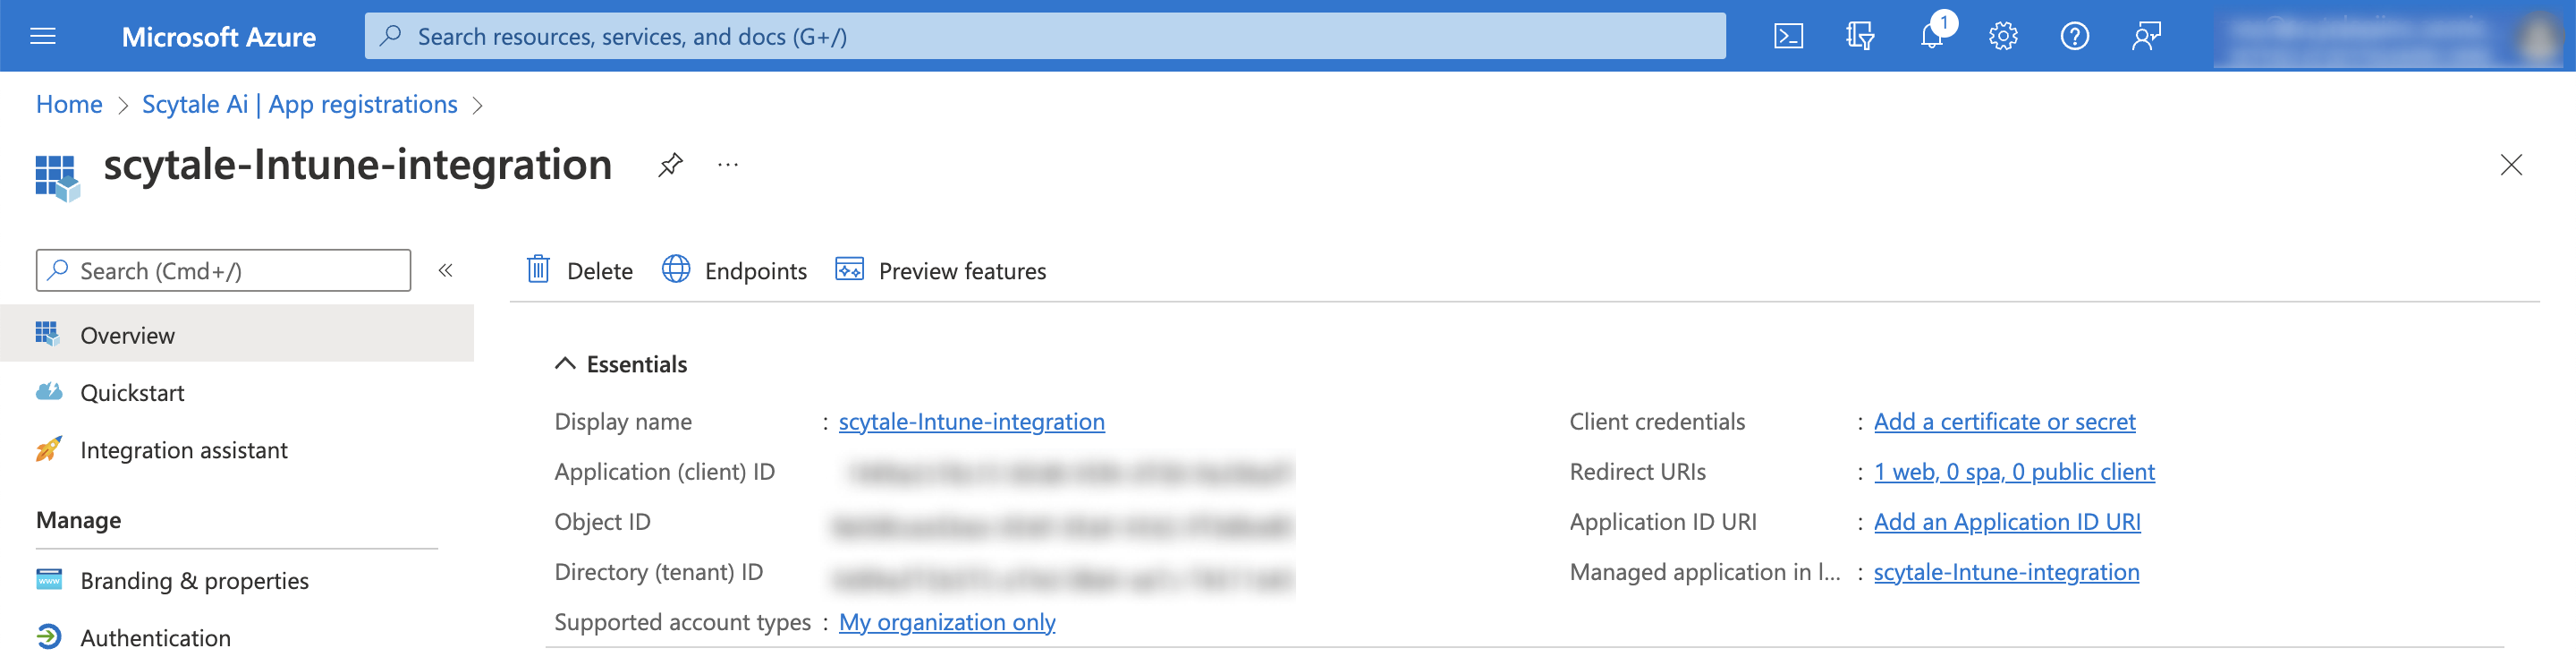
Next, navigate to the app registrations page.
-
On the app registrations page, click on scytale-Intune-integration (the application you just created in the previous step).
-
On the left menu, select "overview".
-
Under "Essentials", copy the (A) - Application (Client) ID and the (B) - Directory (tenant) ID (You'll need this to connect the integration in step 3).
Step 2: How to Create a New Client Secret for the App
-
Ensure you are still within the "scytale-intune-integration" created in step 1.
-
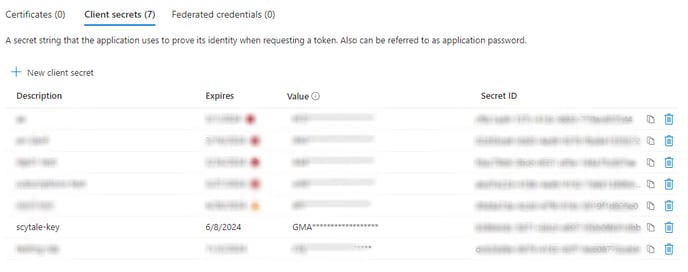
Go to "Certificates & secrets"
-
Click on New client secret
-
Description - you can choose a description, for example: scytale-intune-key
-
Expires - we recommend selecting 24 months, as we cannot collect data after the key expires.
-
Click on Add

-
-
Click on the copy sign on the (C) - "Value" column. (You'll need this to connect the integration in step 3)
-
Go to App registrations.
-
Go to the app that you created in step 1: scytale-Intune-integration.
-
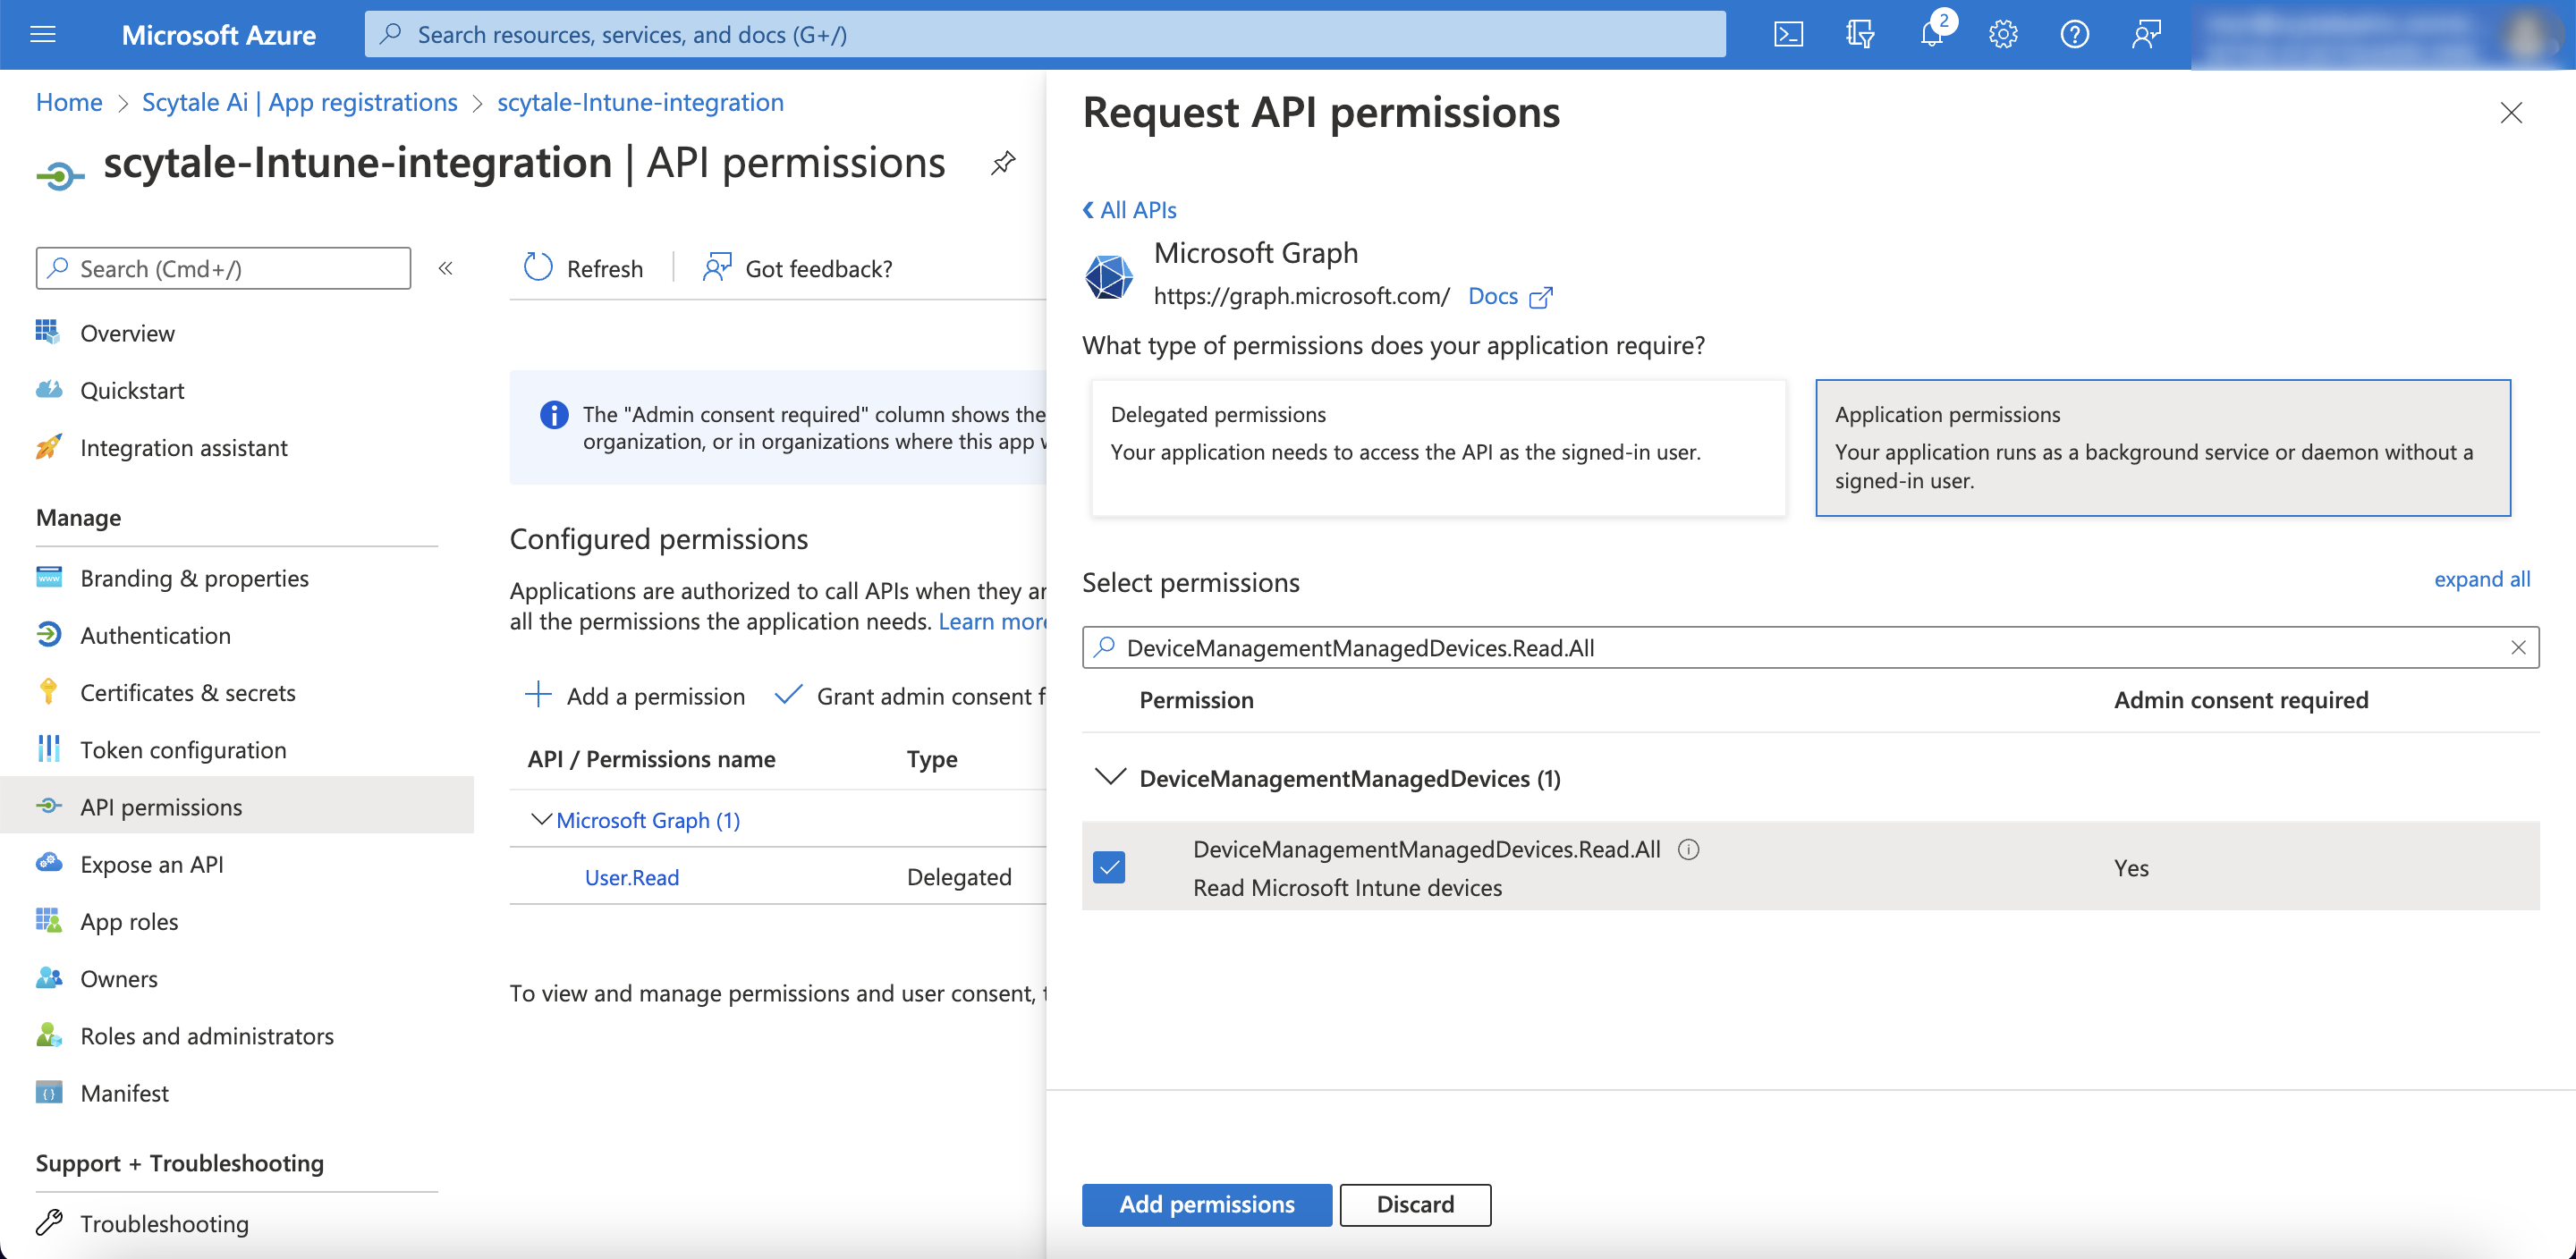
Go to "API permissions"
-
Click on Add a permission
-
Under "Request API permissions",
-
In Microsoft API's tab, select "Microsoft Graph" and then select select "application permissions".
-
Select to add the following permissions (you can search for the permissions in the list):
-
- DeviceManagementManagedDevices.Read.All
- DeviceManagementConfiguration.Read.All
-
-
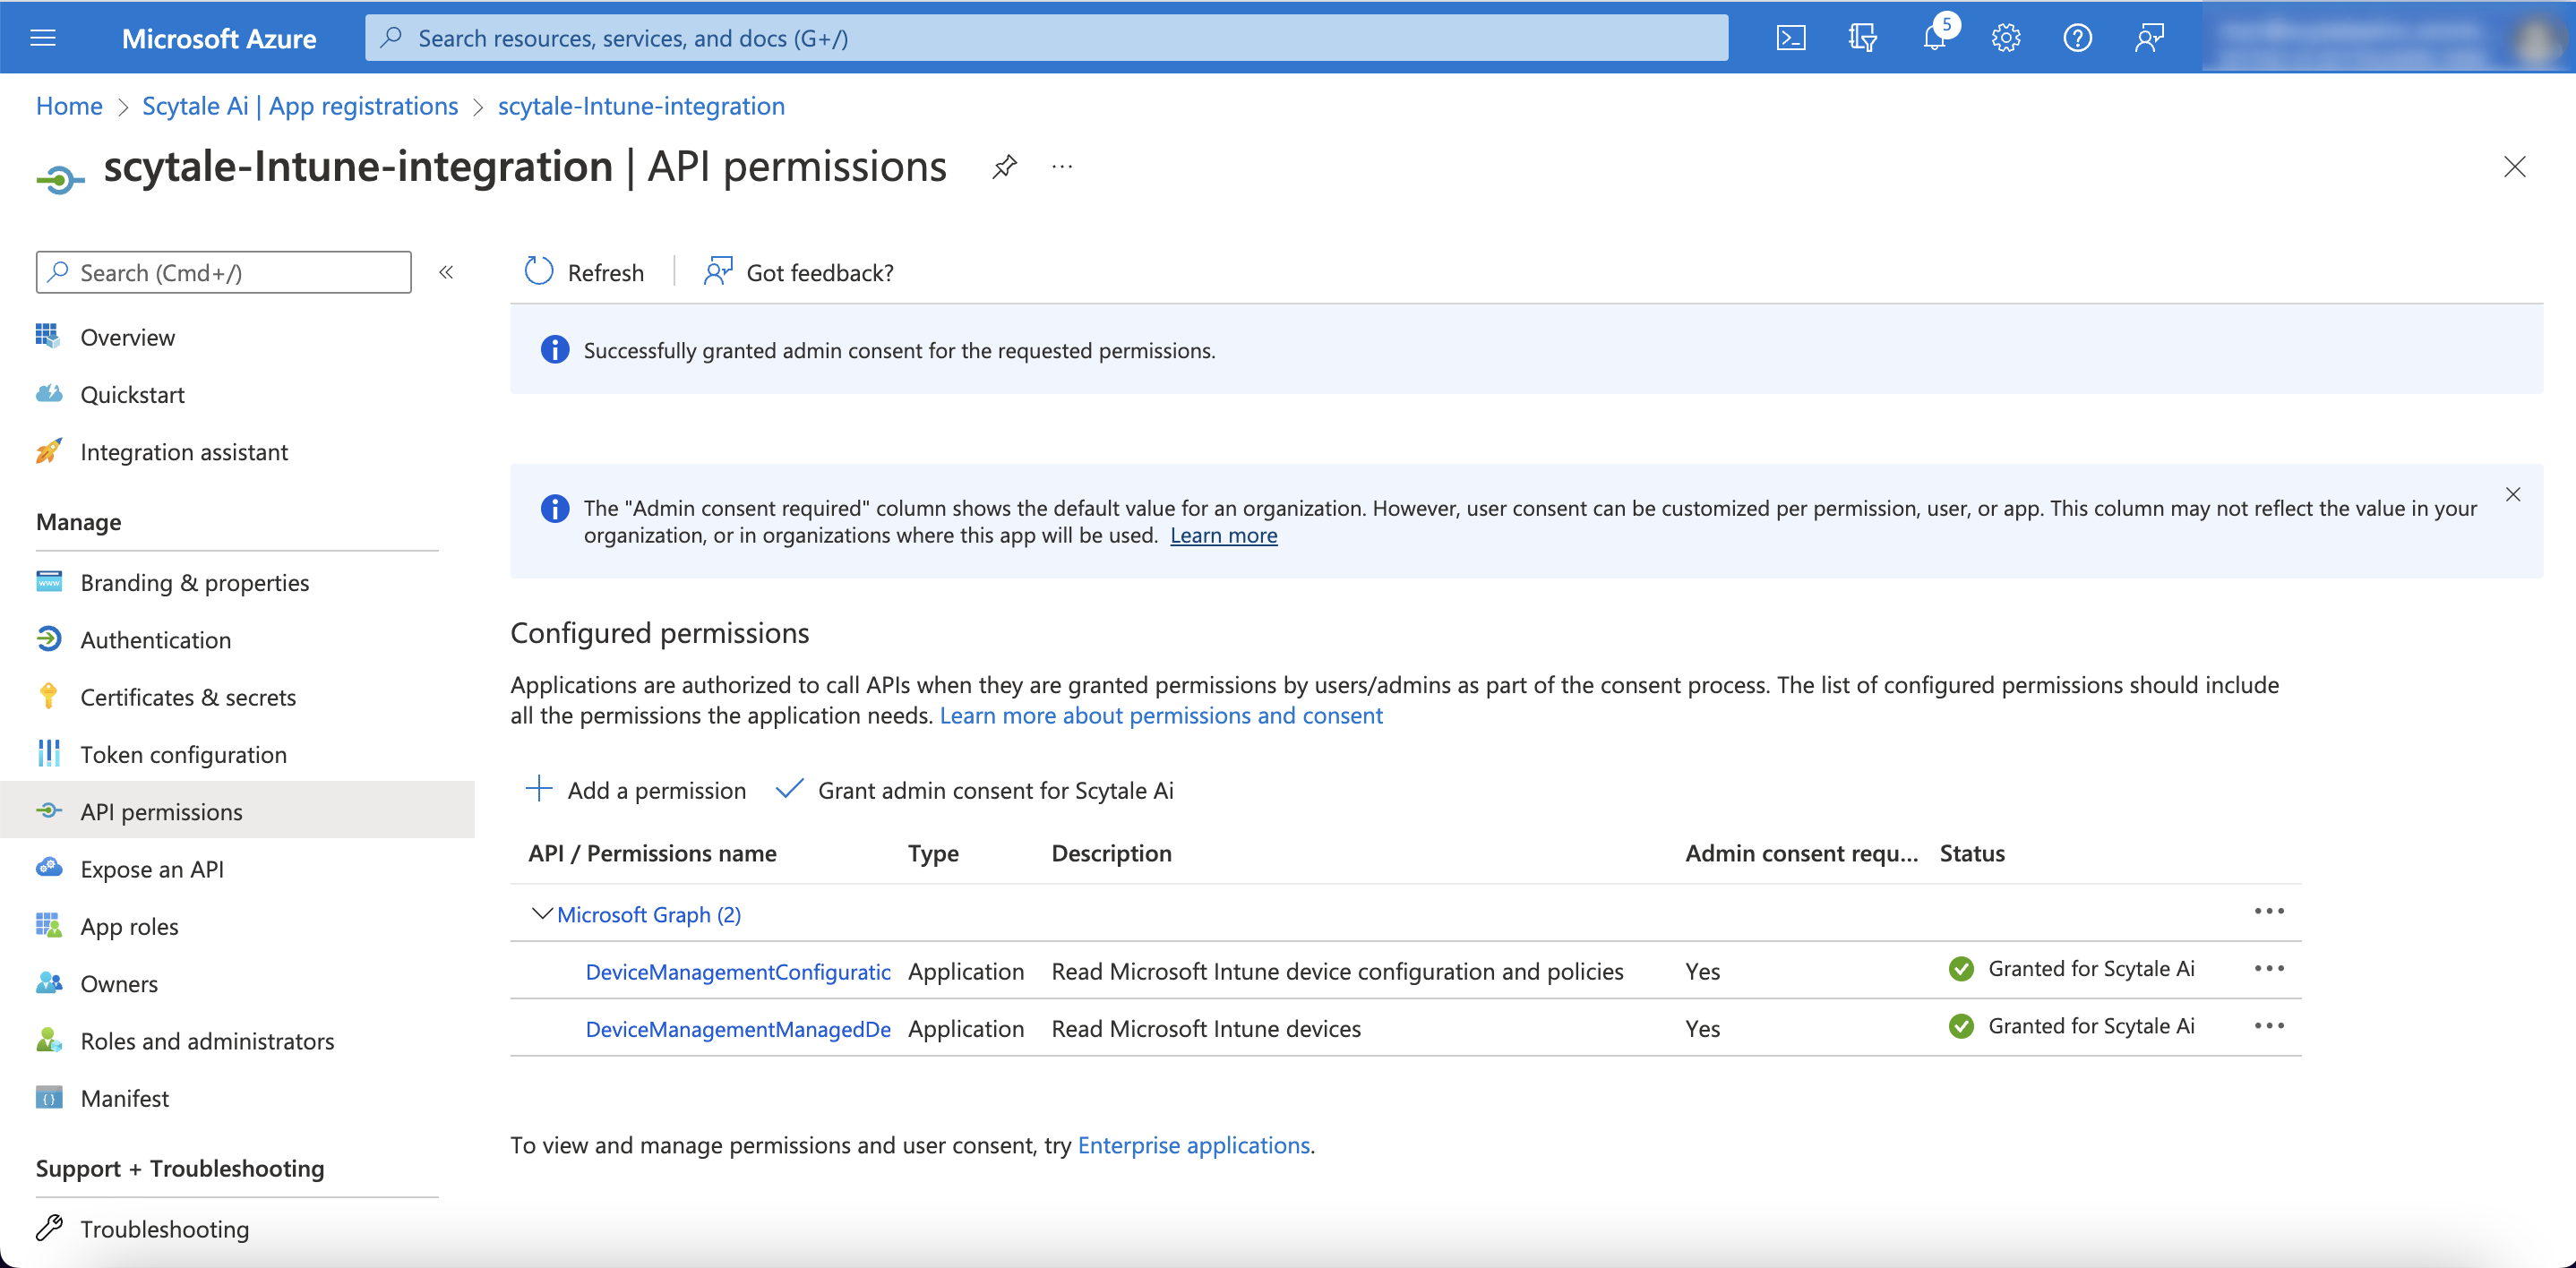
Click on Add permissions
- Under API permissions - to grant permission, select "Grant admin consent for Default Directory".