In this article, you will understand step by step how to easily integrate with Microsoft SharePoint
Note: Currently, the SharePoint integration supports syncing individual files only—not folders. Folder syncing will be supported soo.
Permissions for Microsoft SharePoint Integration
To successfully connect to SharePoint, it's essential to configure the correct Microsoft Graph permissions. You have two options depending on the level of access you want to grant:
Full Read Access to All Sites
Note: While admin permissions are requested during setup, we only access the specific files you choose to sync. This ensures your data stays secure and fully under your control.
-
Create an application in Azure Active Directory.
-
Add the Files.Read.All permission from Microsoft Graph (Application permissions).
-
Grant admin consent for the permission.
This will allow the app to read files across all SharePoint sites.

Alternative Option: Read Access to Specific Sites Only
To restrict access to selected SharePoint sites, follow these steps:
-
Create an application in Azure Active Directory.
-
Add the Sites.Selected permission from Microsoft Graph (Application permissions).

-
Grant admin consent for the permission.
- Copy
/_api/site/idand paste it to the URL of the page.
Example:
For root site:https://companyname.sharepoint.com/_api/site/id
Copy theidvalue from the page and save it. You will need this later on. -
Go to the Graph Explorer and log in with an Azure admin account.
-
Use a POST request to this endpoint and add in /sites/{site-id} (replace
{site_id}with the id you copied in step 4)-png.png?width=688&height=71&name=image%20(3)-png.png)
-
Use the following request body, replacing
app-idandapp-namewith your app’s values:{
"roles": ["read"],
"grantedToIdentities": [{
"application": {
"id": "app-id",
"displayName": "app-name"
}
}]
}

8. Open the Modify Permissions tab and click Open the permissions panel.
9. Search for and consent to Sites.FullControl.All - this is needed for Graph Explorer to execute the request.
After granting consent, you should be able to run the query successfully
Note: First complete the POST request. Only then should you copy and paste the Application ID, Secret Value, and Directory ID into Scytale.
How to Connect Scytale and Microsoft SharePoint
1) In Scytale, go to 'Integrations'.

2) Search for Microsoft Sharepoint and select 'Connect'.

3) Fill in the following details:
- Application ID - follow step 1 below
- Secret Value - follow step 2 below
- Directory ID (tenant) - follow step 1 below
Follow the steps in this article to learn how to get these credentials
Add a connection name - this will be used to differentiate between your connections - and then select 'Connect'.

4) Select 'Connect' to be redirected to Microsoft to approve the connection.

5) Select 'Accept'.

You have now successfully connected to Microsoft SharePoint!
Learn how to sync files from Microsoft SharePoint to the:
➡️ Policy Center
➡️ Control Center
Step 1: How to Register an Application in Azure Active Directory - Create Application and Directory ID
-
Log in to the Azure portal and then navigate to Microsoft Entra ID.
-
On the left menu, click on App registrations
-
On the screen that loads, click on New registration and fill in the following details:
-
Name - you can choose a name, for example: scytale-sharepoint-integration
-
Supported account types - the first option must be selected - "Accounts in this organizational directory only (Default Directory only - Single tenant)".
-
Redirect URI - select Web from the drop-down menu, and in the text box paste the following:
https://api.scytale.ai/integrations/microsoft-graph/callback/microsoft-graph -
Click on Register
-


-
Next, navigate to the app registrations page.
-
On the app registrations page, click on scytale-sharepoint-integration (the application you just created in the previous step).
-
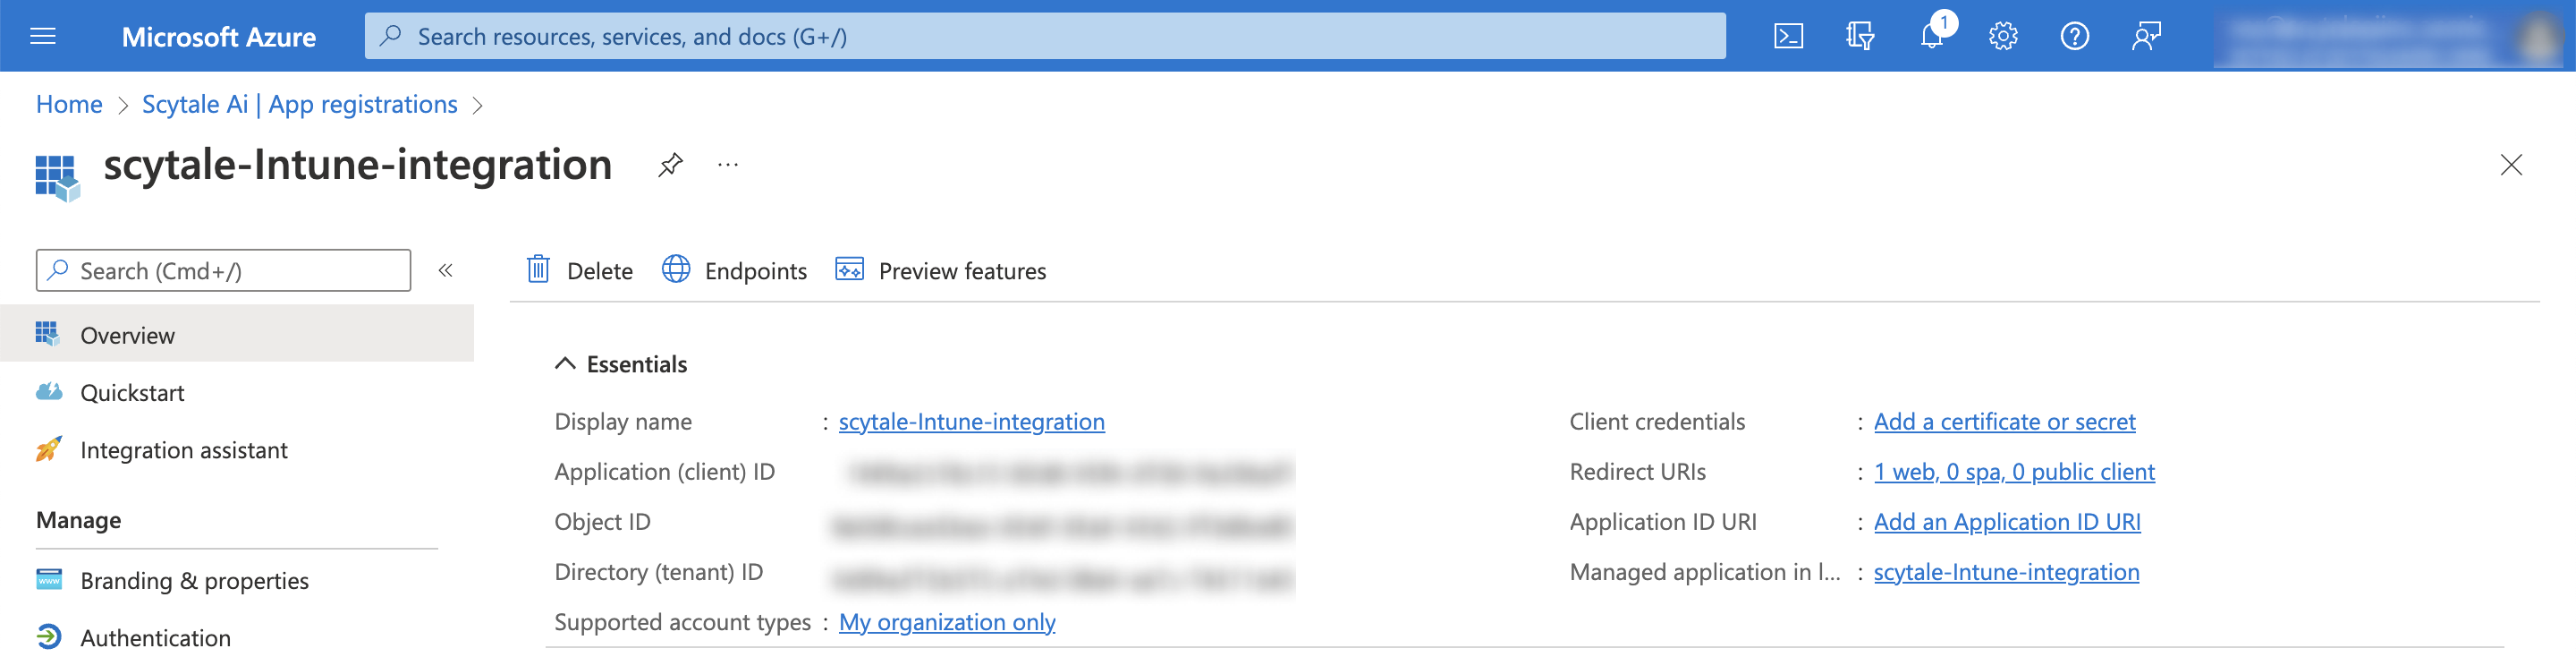
On the left menu, select "overview".
-
Under "Essentials", copy the (A) - Application (Client) ID and the (B) - Directory (tenant) ID
Step 2: How to Create a New Client Secret for the App
-
Ensure you are still within the "scytale-sharepoint-integration" created in step 1.
-
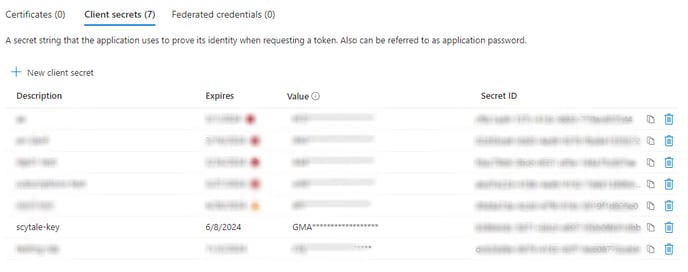
Go to "Certificates & secrets"
-
Click on New client secret
-
Description - you can choose a description, for example: scytale-sharepoint-key
-
Expires - we recommend selecting 24 months, as we cannot collect data after the key expires.
-
Click on Add

-
-
Click on the copy sign on the (C) - "Value" column.
-
Go to App registrations.
-
Go to the app that you created in step 1, ex: scytale-sharepoint-integration.
-
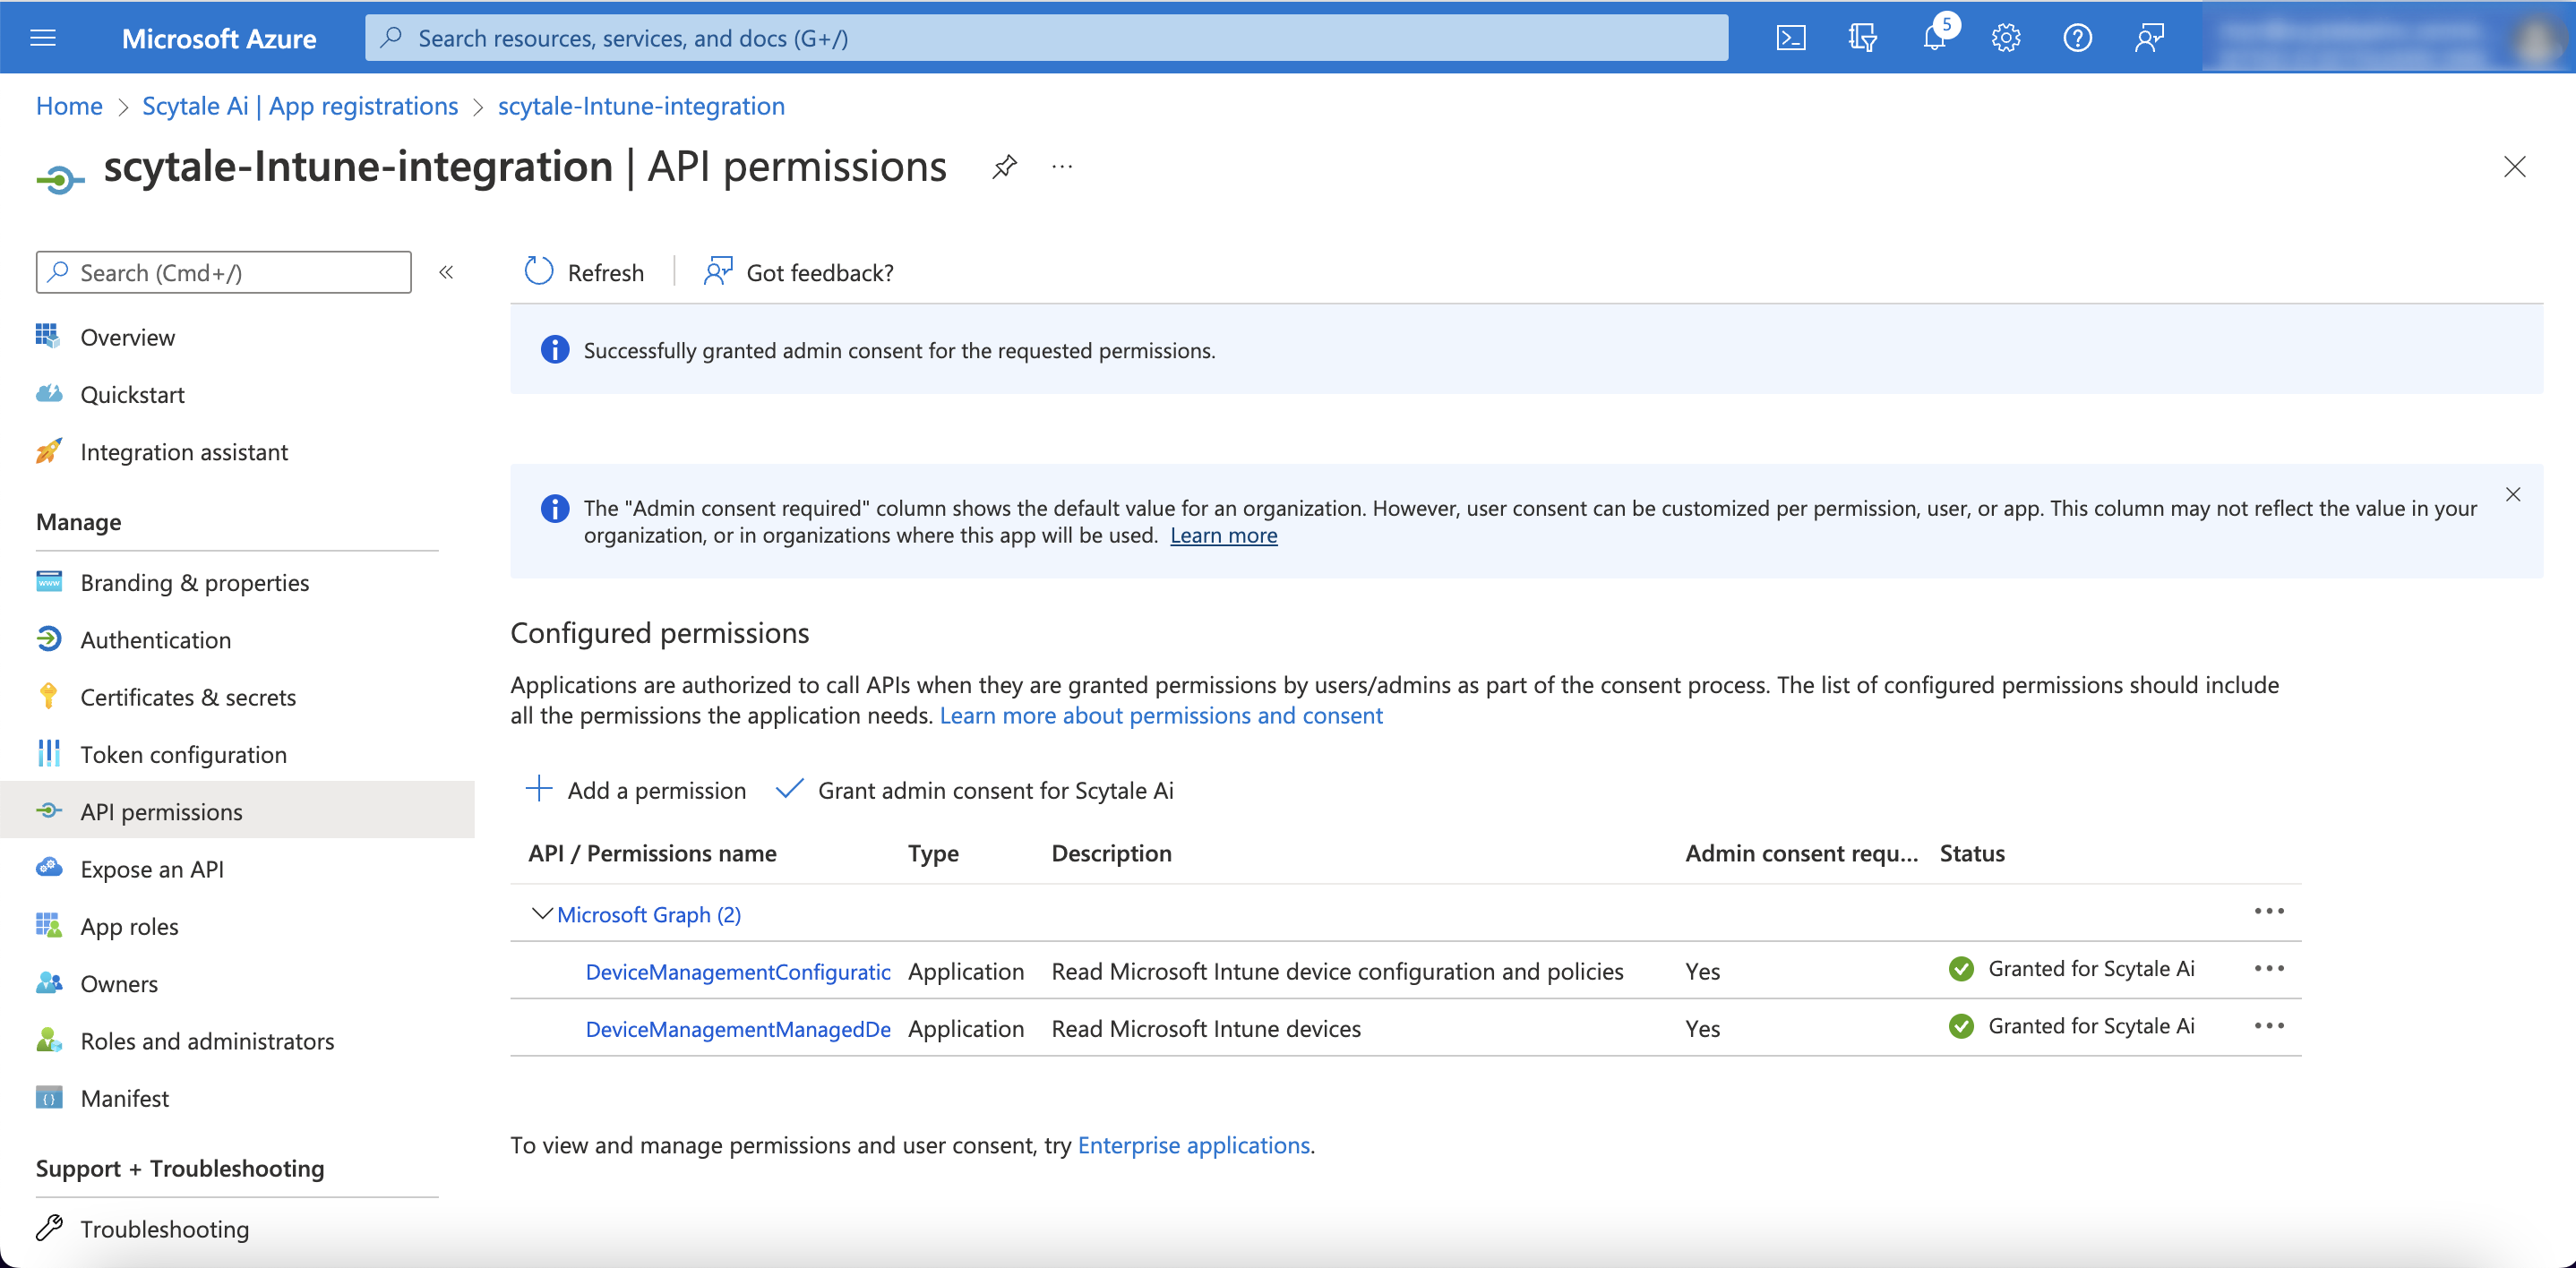
Go to "API permissions"
-
Click on Add a permission
-
Under "Request API permissions",
-
In Microsoft API's tab, select "Microsoft Graph" and then select select "application permissions".
-
Select to add the following permissions (you can search for the permissions in the list):
-
- DeviceManagementManagedDevices.Read.All
- DeviceManagementConfiguration.Read.All
-
-
Click on Add permissions
- Under API permissions - to grant permission, select "Grant admin consent for Default Directory".