In this article, you will understand step by step how to easily integrate with Intercom
Integrating with Intercom will collect the support tickets. It will reduce the manual work, time, and effort required to populate the necessary evidence for the control - as it will automatically be collected. This integration will only export and track all the closed tickets, that will support the Communication and Information SOC 2 criteria. This extraction process is automated by Scytale.
Permissions for Intercom Integration
Below you will find a list of appropriate permissions. All the permissions that Scytale needs for the integration with Intercom, are read-only permissions and do not allow us to perform any actions within your Intercom account.
Read conversationRead adminsRead one admin
How to Connect Scytale and Intercom
1) In Scytale, go to 'Integrations'.

2) Search for Intercom in the search bar and select 'Connect'.

3) Add a connection name - this will be used to differentiate between your connections - and then select 'Next'.

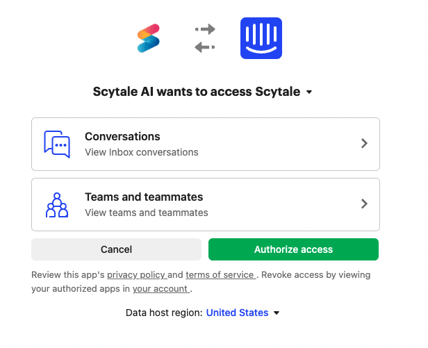
4) Select 'Connect' to be redirected to Intercom to authorize the conection.

5) On the Intercom page, click on the "Authorize access".