In this article, you will understand step by step how to easily integrate with HiBob
Permissions For HiBob Integration
About: View selected employees' About sectionsLifecycle: View selected employees' Lifecycle sectionsWork: View selected employees' Work sectionsWork contact details: View selected employees' work contact details sectionsPeople's tasks: View and mark selected people's tasks as in/complete
Prerequisites For HiBob Integration
HiBob Service User
To integrate Scytale with HiBob seamlessly, create a Service User. This user type manages APIs in HiBob and remains active regardless of the creator's status. Read more about the service user method.
Admin Role
Connect to Hibob with the Admin role. The Admin role is necessary for creating the service user and assigning the scope of permissions.
Onboarding and Offboarding Tasks
To collect data related to employee Onboarding and Offboarding tasks, it's crucial to label the workflow that contains the terms onboarding/offboarding. For example: Onboarding new employees.
Otherwise, data might not be captured. This is due to the flexibility of the task feature in Hibob that's not just confined to onboarding or offboarding tasks, but can accommodate any task.
How to Connect Scytale and Hibob
1) In Scytale, go to 'Integrations'.

How To Create Credentials In HiBob
1. Create Service User

1. From the left menu, select Settings > Integrations
2. Select Automation
3. Click the Service Users

4. In the “Create a service user” modal, enter 'Scytale' for the Display Name and add descriptions, then click Create.

5. The new service user's ID and Token are now visible. Be sure to save these for later use (step 4), as they will serve as your API credentials.
Important: Copy both the ID and Token, but do not paste them in Scytale at this time. After copying, store them in a notepad for safekeeping.
Be aware that if the Token is lost, it cannot be retrieved again.

2. Create permission group

1. Click on the Settings icon from the left menu, then Permissions Groups
2. Click + Add permission group and select 'Service user' from the dropdown.
3. Enter the group name as Scytale Permission Group and add a description.
Under Members, select the Service user 'Scytale'
4. In People's data, delete the default condition - when creating a new permission group for service users, ensure to remove any default conditions such as Lifecycle status = Employed

5. Click on Select people by name, and search for and select all company employees.


And enable the following permissions:
People:
View selected employees’ About sections
View selected employees’ Lifecycle sections
View selected employees’ Work sections
View selected employees’ Work contact details sections
View selected employees' Basic info sections
Tasks and flows:
View and mark selected people’s tasks as complete or incomplete
7. Click Save. A summary of changes will appear for you to review and ensure everything has been set correctly. Then click Apply.
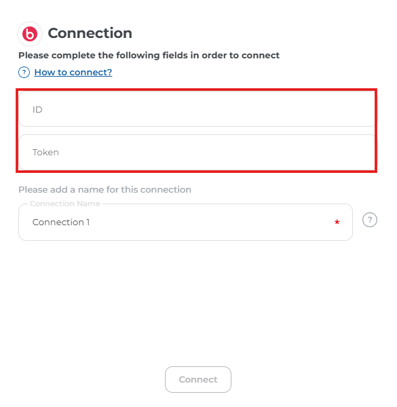
Go back to Scytale to paste the ID and Token you generated in HiBob
FAQs
What data do we collect from HiBob?
- List of all employees
- List of new employees
- List of terminated employees
- Onboarding tasks
- Offboarding tasks
Troubleshooting
1. Permission error when connecting HiBob:
You may encounter this error in the Scytale connection if incorrect permissions have been granted in HiBob.
How to solve? Review the step of creating a permission group and ensure that you have enabled those permissions.
-png.png?width=400&height=404&name=Untitled%20(7)-png.png)
2. Data collection issues:
Are not all the data being collected for the relevant monitors?
You can use the "Test Connection" feature to check for any issues with the connection setup.
-
- Navigate to the integrations
- Click on the HiBob connection box
- Proceed to the active connection
- Click on the context menu
- Select "Test Connection"
- If the connection validation fails, an error message will be displayed

