In this article, you will understand step by step how to easily integrate Scytale with GCP Resource Manager
Permissions for GCP Resource Manager Integration
To connect GCP Resource Manager with Scytale, the following roles must be granted to the service account:
Project-Level Roles:
-
Cloud SQL Viewer -
Storage Object Viewer -
Storage Insights Viewer -
Compute Viewer -
Security Reviewer
Organization-Level Role (Extra Step):
-
Access Transparency Admin– grants the following permissions:-
axt.labels.get -
axt.labels.set -
resourcemanager.organizations.get -
resourcemanager.projects.get -
resourcemanager.projects.list
-
How to Connect Scytale and GCP Resource Manager
-
In Scytale, go to 'Integrations'.

-
Search for GCP Resource Manager and select 'Connect'.

-
Click 'Upload JSON File' and attach the file generated in GCP (follow the steps below).
-
Once uploaded, the required fields will be auto-filled.
-
Add a connection name – this will be used to differentiate between your connections – and then select 'Next'.
-
Click 'Connect' to complete the setup.
You have now successfully connected to GCP Resource Manager!
How to Prepare Your Service Account and Credentials in GCP
Step 1: Enable Required API
-
Go to APIs & Services → Library.
-
Search for and enable the following API:

Step 2: Create a Service Account
-
Navigate to IAM & Admin → Service Accounts.
-
Click 'Create Service Account'.
-
Phase 1:
-
Name:
GCP-integrations -
Service Account ID will auto-populate
-
Click Create and continue

-
-
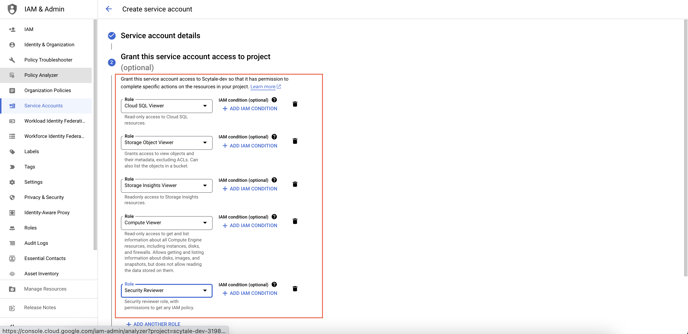
Phase 2: Assign the following roles:
-
Cloud SQL Viewer -
Storage Object Viewer -
Storage Insights Viewer -
Compute Viewer -
Security Reviewer
-
-
Phase 3: Skip user access (optional) → Click Done
Step 3: Assign Organization-Level Permissions (Required for Resource Manager)
-
In GCP, go to IAM & Admin → IAM (at the Organization level).
-
Click 'Grant Access'.
-png.png?width=688&height=328&name=Untitled%20(37)-png.png)
-
New principals: Enter the service account email
-
Role: Select Access Transparency Admin
-png-1.png?width=688&height=328&name=Untitled%20(39)-png-1.png)
- The following permissions will be used:
- axt.labels.get
- axt.labels.set
- resourcemanager.organizations.get
- resourcemanager.projects.get
- resourcemanager.projects.list
5. Click Save
Step 4: Generate JSON File
-
Go to IAM & Admin → Service Accounts.
-
Select the service account you created.
-
Navigate to the 'Keys' tab → Click Add Key → Create new key.

-
Choose JSON and click Create.
-
Save the downloaded JSON file — you will upload this into Scytale.
