In this article, you will understand step by step how to easily integrate with CrowdStrike
Permissions for CrowdStrike Integration
Detections - ReadHosts - ReadHost Groups - ReadUser Management - Read
How to Connect Scytale and CrowdStrike
1) In Scytale, go to 'Integrations'.

2) Search for CrowdStrike in the search bar and select 'Connect'.

3) Fill in the fields:
Base URL - Select your Base URL from the dropdown options
Client ID - Paste the Client ID you copied
Client Secret - Paste the secret you copied
Learn how to create these credentials in CrowdStrike below.

4) Add a connection name - this will be used to differentiate between your connections - and then select 'Connect'.
You have now successfully connected to CrowdStrike!
How to Create an API Key in CrowdStrike
1. The API Key creation flow starts by navigating the console menu
2. In the console menu, navigate to Support and Resources item
3. Click Create API client in the upper right
4. Fill in the (API Key) Client name - Scytale CrowdStrike integration
5. Fill in the (API Key) Description - Scytale CrowdStrike integration
6. Scroll the Scopes pane and select the following scopes for the API Key:
4. Fill in the (API Key) Client name - Scytale CrowdStrike integration
5. Fill in the (API Key) Description - Scytale CrowdStrike integration
6. Scroll the Scopes pane and select the following scopes for the API Key:
- Detections - Read
- Hosts - Read
- Host Groups - Read
- User Management - Read
7. Click Create

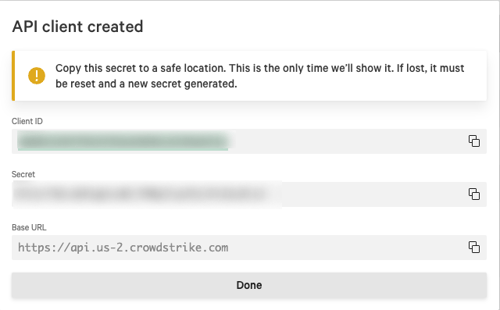
8. A modal dialog is rendered:
- Client ID - Click on the copy icon to copy the ID to the clipboard
- Secret - Click on the copy icon to copy the ID to the clipboard
- Note: The secret key will not be shown again – though, if it is lost, a new one can be generated
- Client Base URL - The CrowdStrike cloud environment to which API requests are directed
- Click Done to dismiss the modal dialog

FAQs
What data do we collect from CrowdStrike?
- List of devices
- Antivirus agent versions
- List of detections found
- User list - Coming soon
